
Setting up Google Analytics (GA4) comes down to four steps: create a Google Analytics account, add a GA4 property with a web data stream, install the Google tag on your site via your CMS, a manual snippet, or Google Tag Manager, then confirm data is flowing in the Realtime report. That is the whole process. Everything else is configuration you can return to later. GA4 setup is completely free under standard usage limits, so there is no cost barrier to getting started.
Your immediate checklist:
- Sign in at analytics.google.com and create an account
- Create a GA4 property and add a web data stream
- Copy your Measurement ID (G-XXXXXXXXXX) and install the Google tag
- Open Realtime in GA4 and visit your site to confirm a hit appears
- Add a cookie consent banner and update your privacy policy
UK privacy note: Under ICO guidance, you need a cookie consent banner before GA4 can collect data from UK visitors. Without consent, measurement will be reduced. Add a compliant banner and update your privacy policy before going live with tracking.
Key takeaways
A complete Google Analytics setup for a UK small business requires four steps: create an account and GA4 property, add a web data stream with Enhanced Measurement on, install the Google tag via your CMS or Tag Manager, and verify data in Realtime before configuring conversions and privacy settings.
| Point | Details |
|---|---|
| Four-step setup | Create account, add GA4 property and data stream, install tag, verify in Realtime. |
| Enhanced Measurement | Leave it on by default — it tracks page views, scrolls, and outbound clicks automatically. |
| UK privacy compliance | A cookie consent banner and updated privacy policy are required before going live with tracking. |
| Prioritise conversions | Mark your contact form and phone link as conversions first — these show whether your site is working. |
| Ace-sites integration | Paste your Measurement ID into the Ace-sites analytics field, or use the done-for-you service for a hands-off setup. |
Table of Contents
- How to create your Google Analytics account and GA4 property
- How to add a web data stream and enable Enhanced Measurement
- Three ways to install the Google tag on your website
- How to verify your Google Analytics setup is working
- Setting up conversions, linking Search Console, and managing access
- Privacy essentials for UK websites using Google Analytics
- How to add Google Analytics to an Ace-sites website
- Quick troubleshooting checklist
- What actually matters when time is short
- Your website is already set up — analytics should be too
- Useful resources
- Sources
How to create your Google Analytics account and GA4 property
The account structure in GA4 has three levels: account, property, and data stream. Your account is the top-level container (usually your business name). A property sits inside it and represents a single website or app. The data stream is the specific source of data, such as your website URL. Getting this right from the start saves a lot of reorganising later.
Step-by-step account and property creation
- Go to analytics.google.com and sign in with your Google account.
- Click Start measuring (or Admin → Create → Account if you already have an account).
- Enter an account name (your business name works well) and review the data-sharing settings. Most small businesses can leave these at their defaults.
- Click Next, then enter a property name (e.g. "My Business Website"), your reporting time zone, your currency, and your industry category and business size.
- Click Create and accept the terms of service.
Once the property is created, GA4 will prompt you to add a data stream. Carry on to the next step.
When to create a separate account versus additional properties: if you run two completely separate businesses, give each its own account. If you have one business with multiple websites (say, a main site and a booking microsite), create one account with two properties. A single website always maps to a single property.
The Setup Assistant (Task Assistant) in GA4 organises your remaining configuration tasks into a checklist. Once your property is live, check it under Admin → Setup Assistant to see what still needs attention.
Pro Tip: For UK businesses, set your time zone to "United Kingdom" (GMT/BST) rather than a US zone. This keeps your daily session data aligned with your actual business hours. Set currency to British Pound (GBP) so any revenue data you collect later is reported correctly.
How to add a web data stream and enable Enhanced Measurement
With your property created, the next step is adding a data stream. This tells GA4 where your data is coming from.
In your new property, click Web when prompted to choose a platform. Enter your website URL and give the stream a name (your domain name is fine). Leave Enhanced Measurement toggled on.
What Enhanced Measurement tracks automatically
Google recommends keeping Enhanced Measurement enabled because it collects useful interaction data without any extra code. Here is what you get out of the box:
| Event | What it tracks |
|---|---|
page_view | Every page load |
scroll | When a visitor reaches most of a page |
outbound_click | Clicks on links leaving your site |
site_search | Searches using your site's search bar |
video_start | Plays on embedded YouTube videos |
file_download | Clicks on downloadable files (PDFs, etc.) |
For most small businesses, these events cover the majority of useful behaviour data with zero additional setup.
After saving the stream, GA4 shows you your Measurement ID, which looks like G-XXXXXXXXXX. Keep this handy. It is what you paste into your CMS or use inside Google Tag Manager to connect your site to your property.
Three ways to install the Google tag on your website
There is no single "right" method. The best choice depends on your platform and how much you expect your tracking to grow.
Option 1: Native CMS or website builder field (easiest)
Many website builders accept a G- Measurement ID directly, so you simply paste it into a dedicated analytics field in your platform's settings. No code editing required. This is the preferred route because the integration is maintained by the platform and survives future updates without breaking your tracking.
- WordPress: Install the free Site Kit by Google plugin, which connects GA4 without touching any code. Alternatively, paste the Measurement ID into your theme's header settings if your theme supports it.
- Shopify: Go to Online Store → Preferences and paste your Measurement ID into the Google Analytics field. Shopify handles the rest natively.
- Other builders: Check your platform's analytics or integrations settings for a Google Analytics or Measurement ID field. If it exists, use it.
Option 2: Manual gtag.js snippet
If your platform does not have a native field, copy the full gtag.js snippet from your GA4 data stream setup screen and paste it immediately after the opening <head> tag on every page. Placing it in the body instead of the <head> is one of the most common beginner mistakes and leads to partial or inconsistent data collection.
Option 3: Google Tag Manager (recommended for growth)
Google strongly recommends Tag Manager when you expect to add more tags or change tracking later, because it lets you manage everything from one dashboard without touching your site's code again.
Quick GTM setup:
- Create a free account at tagmanager.google.com and set up a Web container for your domain.
- Install the GTM snippet on your site (one snippet in
<head>, one in<body>). - Inside GTM, create a new Tag using the Google Analytics: GA4 Configuration template and enter your Measurement ID.
- Set the trigger to All Pages and publish the container.
Pro Tip: If your site already has a Google tag installed (from a previous setup or another Google product), do not add a second one. Instead, add your GA4 property as an additional destination to the existing tag. Two tags on the same page cause duplicate data.
How to verify your Google Analytics setup is working
Once the tag is installed, you need to confirm data is actually arriving before you do anything else.
Using Realtime reports
Open your GA4 property, click Reports → Realtime, then visit your website in a separate browser tab. Within a minute or two you should see yourself appear as an active user. After installation, it can take up to 30 minutes for data to appear in standard reports, but Realtime is near-instant, so it is the fastest way to confirm the tag is firing.

Using DebugView and Tag Assistant
For deeper validation, use DebugView (found under Admin → DebugView in GA4). It shows every event firing from your device in real time, including the event name and parameters. To activate it, install the Google Tag Assistant Chrome extension, turn on debugging for your site, and reload the page. Events will start appearing in DebugView within seconds.
Always test in an incognito window. Browser extensions, including ad blockers, can suppress the GA4 tag and make it look like tracking is broken when it is actually working fine for real visitors. An incognito window with no extensions gives you a clean test environment.
Common failures and quick fixes
- No data in Realtime: check that the tag is in
<head>, not the body, and that it is present on the page you are visiting. - Tag fires on some pages but not others: the snippet may be missing from certain page templates. If you used GTM, check the trigger is set to All Pages.
- Duplicate sessions or events: you have two tags on the same page. Remove one and use the destination method instead.
- Consent banner blocking all data: this is expected behaviour. Your consent tool needs to allow the GA4 tag to fire for consenting users. Check your consent platform's Google Analytics integration settings.
Setting up conversions, linking Search Console, and managing access
Basic tracking is live. Now make it useful.
Marking events as conversions
In GA4, any event can be a conversion. Go to Admin → Events, find the event you want to track as a goal, and toggle Mark as conversion. For a small business, the most valuable conversions to set up first are:
- Contact form submission (usually a
form_submitorgenerate_leadevent) - Phone number click (an
outbound_clickevent on your phone link) - Booking or appointment completion (a
purchaseor custom event depending on your booking tool)
These three tell you directly whether your website is generating enquiries and bookings, which is the whole point of having a site.
Linking Google Search Console and Google Ads
- In GA4, go to Admin → Product links.
- Click Search Console links, then Link and follow the prompts to connect your verified Search Console property.
- Repeat for Google Ads links if you run paid campaigns.
Linking Search Console brings organic search query data into GA4, so you can see which search terms are driving traffic. This pairs well with local SEO work because you can see whether your local search rankings are actually sending visitors.
User roles
| Role | What they can do |
|---|---|
| Admin | Full control, including deleting the property |
| Editor | Change settings and create reports |
| Analyst | Create and edit reports, no settings access |
| Viewer | Read-only access to reports |
For a small team, give your web developer or agency Editor access and keep Admin for yourself. Viewer access works well for anyone who just needs to check reports.
Privacy essentials for UK websites using Google Analytics
GA4 collects personal data, which means UK data protection law applies. Getting this right protects your business and keeps your measurement accurate.
Cookie consent: Under ICO guidance, you need explicit consent before placing analytics cookies on a UK visitor's device. A pre-ticked box or a banner that only informs (without a genuine accept/reject option) does not meet the standard. Use a consent management platform (CMP) such as Cookiebot, CookieYes, or a similar tool that integrates with GA4's consent mode.
What to include in your privacy policy:
- What data you collect and why (e.g. website usage data for analytics purposes)
- That you use Google Analytics and what data it sends to Google
- The lawful basis for processing (legitimate interests or consent, depending on your setup)
- How visitors can opt out (link to Google's opt-out browser add-on)
- Your contact details for data queries
Google Signals: GA4 offers Google Signals, which uses data from signed-in Google users to enrich demographic and cross-device reports. For most small UK businesses, the privacy trade-off is not worth it at the start. You can enable it later under Admin → Data Settings → Data Collection once you have your consent framework in place.
The ICO's guidance on cookies and similar technologies is the authoritative reference for UK compliance. Google's own privacy controls documentation covers the GA4-specific settings.
Quick compliance check: before you publish your site with GA4 active, confirm you have a cookie consent banner, a privacy policy that mentions Google Analytics, and that your consent tool is blocking the GA4 tag until a visitor accepts.
How to add Google Analytics to an Ace-sites website
If your website is built on Ace-sites, the process is straightforward. Platform-native integrations are preferable to manual code insertion because they are maintained by the platform and will not break when the platform updates.
- In your GA4 property, go to Admin → Data Streams, click your web stream, and copy the Measurement ID (G-XXXXXXXXXX).
- Log in to your Ace-sites dashboard and go to your site settings.
- Find the Google Analytics or Analytics ID field (check the Ace-sites features page for the exact location in your plan).
- Paste your Measurement ID into the field and save.
- Publish your site to push the change live.
- Open GA4 Realtime, visit your site, and confirm a hit appears.
If your Ace-sites plan includes a custom code header field, you can also paste the full gtag.js snippet there as an alternative. Either method works; the native field is cleaner.
Pro Tip: If you would rather not handle the setup yourself, Ace-sites offers a done-for-you website service that includes tag installation and basic verification. It is a good option if you want analytics working from day one without spending time on the technical side.
Quick troubleshooting checklist
If data is not appearing after 30 minutes, work through this list before assuming something is seriously wrong.
- Wait the full 30 minutes. Standard GA4 reports have processing latency. Realtime is the exception, not the rule.
- Check tag placement. The snippet must be in
<head>, not the body. Use Tag Assistant to confirm where it is firing. - Test in incognito. Extensions and ad blockers can suppress the tag entirely in your normal browser.
- Check your consent banner. If your CMP is blocking all cookies by default, the GA4 tag will not fire until a visitor accepts. Test by clicking "Accept" on your own banner and checking Realtime again.
- Look for duplicate tags. Open your page source (Ctrl+U) and search for "G-". If your Measurement ID appears more than once, you have a duplicate.
- Cross-domain and subdomain tracking: if you have a booking system or checkout on a different subdomain, use the same GA4 property for both and configure cross-domain measurement under Admin → Data Streams → Configure tag settings → Configure your domains. This prevents sessions from being split across domains.
- Use DebugView for event-level detail. If the tag fires but specific events are missing, DebugView shows exactly which events are reaching GA4 and any parameter errors.
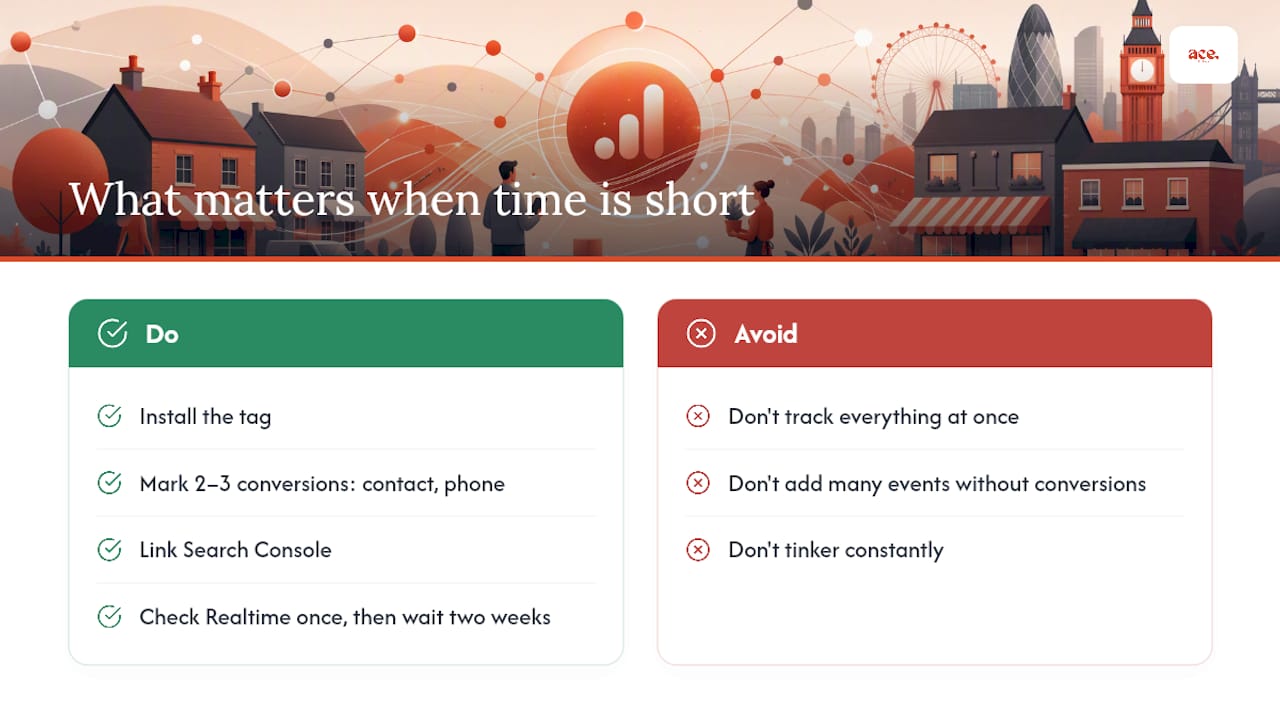
What actually matters when time is short
Most small business owners do not have an hour to spend configuring analytics dashboards. The honest truth is that you do not need to.
Get the tag installed, mark two or three events as conversions (your contact form and your phone link, at minimum), and link Search Console. That gives you the data that actually answers the question every small business owner cares about: is my website bringing in enquiries? Everything else in GA4, the audience reports, the funnel explorations, the attribution models, is useful eventually, but it is noise until you have a few months of clean conversion data to work with.
The temptation is to track everything at once. Resist it. A GA4 property with 40 custom events and no conversions marked tells you almost nothing useful. One property with three clean conversions and a Search Console link tells you whether your site is working.
Check your Realtime report once after setup to confirm the tag fires, then leave it alone for two weeks. Come back when you have enough data to spot a pattern. That is the approach that actually helps a small business make decisions.
Your website is already set up — analytics should be too
Getting your Google Analytics setup right is one thing. Having a website that is built to convert visitors into enquiries is another. Ace-sites gives small businesses a professional, mobile-optimised website with built-in SEO tools, a blog manager, and a platform designed to accept your GA4 Measurement ID without any code editing.

The done-for-you service takes the whole process off your plate: Ace-sites builds your site, installs and verifies your Google tag, and sets up your first conversions so you are collecting meaningful data from day one. No agency fees, no long contracts, and no waiting weeks to go live. If you want to see what an analytics-ready small business website looks like before you commit, browse the Ace-sites features or check the portfolio for live examples. When you are ready, start your free build and pay nothing until you have seen the result.
Useful resources
Official and developer references used in this guide:
- Set up Analytics for a website and/or app — Google's core setup guide covering accounts, properties, data streams and Enhanced Measurement.
- Install your Google tag with a website builder or CMS — Platform-specific installation instructions and the native G- ID integration method.
- Google Analytics for websites (Google for Developers) — Developer reference covering gtag.js, Tag Manager, and tagging best practices.
- Configure your Google Analytics settings using Task Assistant — The Setup Assistant checklist for working through data collection, privacy and product links.
- Data quality and processing latency — Explains the up-to-30-minute delay and how to use Realtime and Data Stream Test to validate installation.
- GA4 setup for CMS-hosted websites — Platform-specific guidance for WordPress, Shopify and other builders.
- ICO guidance on cookies and similar technologies — The authoritative UK reference for cookie consent requirements.
- Ace-sites blog — Further guides on local SEO, website setup and getting more enquiries from your site.
Sources
- Set up Analytics for a website and/or app - Analytics Help
- Google Analytics for websites | Google for Developers
- Configure your Google Analytics settings using Task Assistant - Analytics Help
- Data quality and processing latency - Analytics Help